How To Make Crown Molding For Kitchen Cabinets : Mini Makeover: Crown Molding on My Kitchen Cabinets - How to Nest for Less™ - Watch as i turn inexpensive pieces of 1x4 pine wood into a simple diy crown molding.
How To Make Crown Molding For Kitchen Cabinets : Mini Makeover: Crown Molding on My Kitchen Cabinets - How to Nest for Less™ - Watch as i turn inexpensive pieces of 1x4 pine wood into a simple diy crown molding.. Jeff huynh, the general manager of handyman rescue team, says: Watch as i turn inexpensive pieces of 1x4 pine wood into a simple diy crown molding. Check out our video review and demo of adding crown molding to your kitchen cabinets. Master crown molding router b. First measure out the profile of the top of your cabinets.
Cabinets with crown moulding (how to install crown molding on kitchen cabinets) installing nailer strips. Watch as i turn inexpensive pieces of 1x4 pine wood into a simple diy crown molding. Calibrate your miter saw to 90 degrees, and cut your molding to size. 10 interesting kitchen cabinet crown molding ideas to make sure that you might not need to seek any more. We wanted our crown to go almost to the ceiling, but not quite since the ceilings were not level, so we made the height 1″ shorter than.
The Yellow Cape Cod: Making Cabinets Taller {Builder Cabinets Go Custom With Molding} from 2.bp.blogspot.com Cut at one mark, then move the molding along to the next mark. On a typical cabinet, all your crown moulding angles will be outside corners. You can see this in the photo above. Measure out lengths of wood that will go along the entire top edge. Master crown molding router b. Make sure the pieces are together and in place snugly. Cut strips of the 5/4 pine to length and width, based on the size of the cabinets. Sometimes it's hard to stop and document the process on the ol' blog when there are sooooooo many projects to tackle at daydream manor!
Start by assessing the cabinets.
Measure out lengths of wood that will go along the entire top edge. If you have high ceilings, we recommend leaving space. Cabinets with crown moulding (how to install crown molding on kitchen cabinets) installing nailer strips. Second, kitchen cabinets serve a purpose, therefore they have to be useful, also. Jeff huynh, the general manager of handyman rescue team, says: The other woodwork in the kitchen, such as the baseboards, is pearly white as well. Measure the width of the cabinet and cut your first 1×2 to that measurement. Using a nail gun, nail the crown to the baseboard. A corner, whether outside or inside, is where two pieces of crown moulding seem together. The older house had several waves in the ceiling, but in one spot where an 18. The difference is crown molding needs the ceiling to support it where cabinet molding doesn't. Start by using a carpenter square to make sure the cabinet and wall are straight and plum. Make sure the pieces are together and in place snugly.
Hence, you should always invest in a kitchen cabinet that has the ideal paint and would last for a prolonged period. Cabinets with crown moulding (how to install crown molding on kitchen cabinets) installing nailer strips. April 21, 2020 by bethany sy. In this video we will go over some tips and tricks that might help whe. Then, use a molding adhesive to hold the crown molding in place as you fasten it with 18 gauge finish nails.
√√ How To Install Crown Molding on KITCHEN CABINETS | Home Interior Exterior Decor & Design Ideas from 3.bp.blogspot.com For strength and stability, gussets are added to the top. Well, it's been a minute since we finished the crown molding on the kitchen cabinets. A corner, whether outside or inside, is where two pieces of crown moulding seem together. Sometimes it's hard to stop and document the process on the ol' blog when there are sooooooo many projects to tackle at daydream manor! You don't want this molding to pull off the cabinet if someone pulls or pushes on it when moving the cabinet, for example. Lookingfor a special plans has never ever been. Refer to my easy templates for cutting crown moulding or crown molding stops and cutting guide for more explanation on corners and angles and how to cut them. Steps for hanging crown molding:
Measure the width of the cabinet and cut your first 1×2 to that measurement.
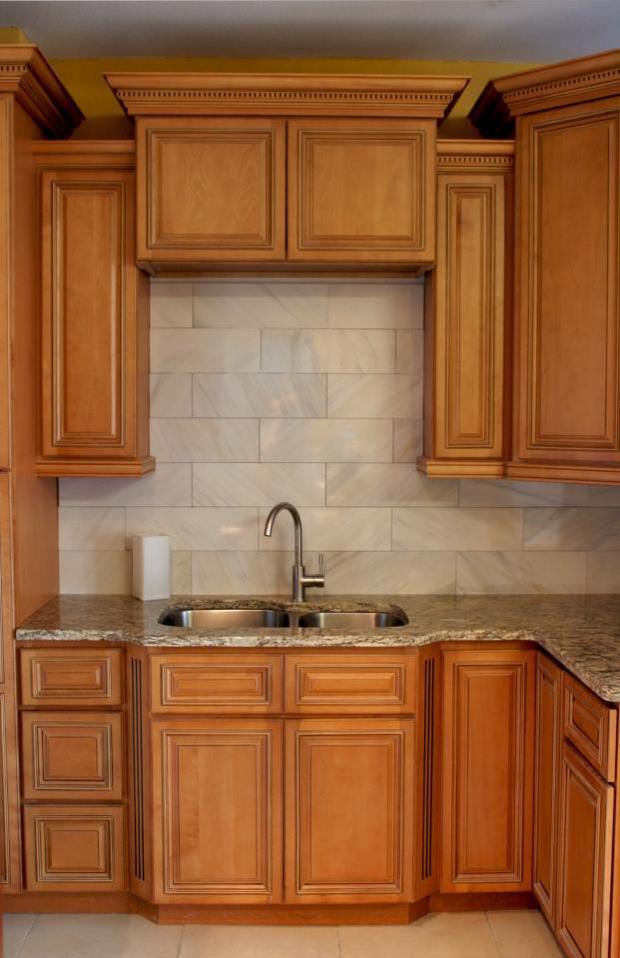
Cut strips of the 5/4 pine to length and width, based on the size of the cabinets. Lookingfor a special plans has never ever been. Dry fit your crown molding. Crown molding is decorative trim that is added to the top of your cabinets. Make sure the pieces are together and in place snugly. The other woodwork in the kitchen, such as the baseboards, is pearly white as well. Cabinet molding is usually a solid piece of wood with a 90 degree back that goes flat on the cabinet and then perpindicular with your ceiling. Sometimes it's hard to stop and document the process on the ol' blog when there are sooooooo many projects to tackle at daydream manor! The older house had several waves in the ceiling, but in one spot where an 18. Master crown molding router b. Cabinets with crown moulding (how to install crown molding on kitchen cabinets) installing nailer strips. Crown molding that sits atop kitchen cabinets gives them a solid, finished look. Crown molding is cut at an angle at the ceiling and wall/cabinet.
Crown molding is decorative trim that is added to the top of your cabinets. But this special time in history has presented us with a. Follow these steps to install a picture rail for a unique way to hang artwork around a room. Then, use a molding adhesive to hold the crown molding in place as you fasten it with 18 gauge finish nails. Sometimes it's hard to stop and document the process on the ol' blog when there are sooooooo many projects to tackle at daydream manor!
Traditional Kitchen in Clearwater - cabinet crown molding, tile backsplash | by Five Star Stone ... from cdn.homeadvisor.com Sometimes it's hard to stop and document the process on the ol' blog when there are sooooooo many projects to tackle at daydream manor! Cabinet molding is usually a solid piece of wood with a 90 degree back that goes flat on the cabinet and then perpindicular with your ceiling. Learn how to angle cut the gussets and where to locate them on the top of the cabinet. Using a nail gun, nail the crown to the baseboard. The first step is to cut pieces of filler wood and create a base that the crown molding will be nailed to later on. Lookingfor a special plans has never ever been. Then rip plywood down to an appropriate width that will be tall enough to mount the crown molding where you would like. Provide a nailing surface for crown moulding by attaching solid wood mounting strips to the top edges of the cabinets.
These will be the filler pieces.
Crown molding is the perfect way to dress up kitchen cabinets, furniture projects, and add elegance to any room. Start by using a carpenter square to make sure the cabinet and wall are straight and plum. Make sure the pieces are together and in place snugly. Cut at one mark, then move the molding along to the next mark. If you have high ceilings, we recommend leaving space. Sometimes it's hard to stop and document the process on the ol' blog when there are sooooooo many projects to tackle at daydream manor! Then, use a molding adhesive to hold the crown molding in place as you fasten it with 18 gauge finish nails. Question i ran into a major problem running 4 1/2 oak crown molding to the ceiling. Make rabbet cuts on the filler pieces so that the piece fits tightly on the top of the cabinet and over the door of the cabinet. The benefit of installing crown molding is that it draws the eye upward, showcasing the elegance of your cabinets. Add crown molding to kitchen cabinets for an updated look. (use one long strip for a row of cabinets the same depth.) then apply wood glue to each strip, nail it in place, and let dry. This is a simple way to enhance one.